


Craving a cheesy, satisfying meal that hits all the fast-food cravings — but made right at home? Look no further. This delicious handheld combines the bold flavors of New York’s famous chopped cheese sandwich with the crispy, toasty design of a crunchwrap.
The result? A fusion-style wrap that’s easy to make, packed with melty cheese, seasoned beef, and serious crunch in every bite.
With seasoned ground beef, melty cheese, and a perfect crunch factor, you’ll be hooked from the first bite. Get ready to master this delicious meal that’s perfect for lunch, dinner, or even game day gatherings.
Table of Contents
Key Takeaways
- Learn how to make a bold and delicious chopped cheese-style wrap at home.
- Explore the origin of this viral comfort food fusion.
- Understand what makes this recipe so crave-worthy.
- Preview the easy steps to creating the ultimate homemade wrap.
- Discover how customizable this dish can be for any taste or diet.
What Are Chopped Cheese Crunchwraps?
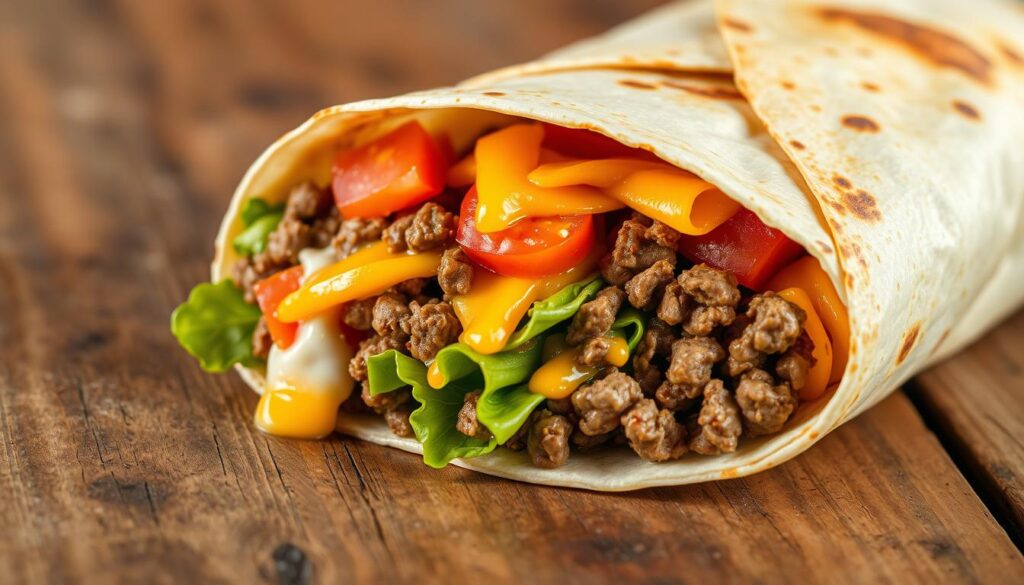
Chopped Cheese Crunchwraps represent a fascinating fusion of culinary traditions, blending the essence of New York’s iconic chopped cheese sandwich with the convenience of a fast-food crunchwrap. This innovative dish combines seasoned beef, melted cheese, fresh vegetables, and a special sauce, all wrapped in a large tortilla with a crunchy tostada shell in the middle.
The result is a homemade recipe that offers a delightful mix of textures and flavors. You get the soft, cheesy filling, the crispness of the vegetables, and the satisfying crunch of the tostada shell, all in one delicious package.
| Component | Description |
|---|---|
| Seasoned Beef | Ground beef cooked with spices and herbs |
| Melted Cheese | Adding a creamy, rich element |
| Fresh Vegetables | Crisp and refreshing, adding texture |
| Special Sauce | A tangy and flavorful addition |
| Tostada Shell | Providing a crunchy contrast |


Ingredients You’ll Need
To make delicious homemade wraps, you’ll need to gather a few essential ingredients. The quality of your ingredients will directly impact the flavor and overall experience of your Crunchwrap.
For the Beef Filling
For the beef filling, you’ll need ground beef (85/15 recommended for best flavor), beef seasoning or taco seasoning, sliced red onions, bell peppers, and a mix of American cheese and shredded cheddar for that perfect melt. Using high-quality ground beef ensures a rich and savory flavor.
For the Special Sauce
The special sauce is a simple yet crucial component, made by combining ketchup, mayonnaise, and your favorite hot sauce. This blend adds a tangy and spicy kick to your Crunchwrap.
For Assembly
For assembly, gather large burrito-sized flour tortillas, crunchwrap-style tostada shells, shredded lettuce, and diced tomatoes. These ingredients come together to create the signature Crunchwrap experience.

Kitchen Equipment Required
To make This fusion dish, you’ll need some basic kitchen equipment that you likely already have on hand. A large skillet or flat griddle is the primary tool you’ll need for cooking the beef filling and toasting the assembled crunchwraps to golden perfection.
You can make these inside on the stove in a skillet, but I love making them outside on my griddle. If you don’t have a griddle, you can make these inside on the stove using a couple of skillets.
| Equipment | Use |
|---|---|
| Large Skillet or Griddle | Cooking beef filling and toasting crunchwraps |
| Spatula with wide, flat edge | Pressing down crunchwraps for perfect seal |
| Cutting Board and Sharp Knife | Prep work and slicing finished crunchwraps |

Having the right equipment makes a difference when applying heat to your crunchwrap. It ensures a crispy exterior and a well-cooked interior.
Preparing the Chopped Cheese Filling
The heart of your Chopped Cheese Crunchwraps lies in the flavorful beef and cheese filling, which is surprisingly easy to prepare. To get started, you’ll need to cook the vegetables and ground beef to perfection.
Cooking the Vegetables
Begin by sautéing onions and peppers on the griddle. If you don’t have a griddle, any flat top or stove top will work. Cook until they’re soft and beginning to caramelize for maximum flavor development.
Seasoning and Cooking the Ground Beef
On a new clean surface, add the ground beef and season with your favorite beef rub. Let it sauté for 3-5 minutes. As it browns, flip the beef and crumble it as it cooks. It takes about 10 minutes for the beef to fully cook.
Adding the Cheese
Once the beef is fully cooked, it’s time for some cheesy goodness! Add 4-5 slices of American cheese on top of your beef and mix it in as it melts.
| Ingredient | Cooking Time | Result |
|---|---|---|
| Onions and Peppers | Until soft and caramelized | Maximum flavor development |
| Ground Beef | 3-5 minutes (initial cooking), 10 minutes (fully cooked) | Perfectly cooked beef |
| American Cheese | Until melted | Cheesy goodness |
Making the Special Sauce
The secret to an authentic homemade wrap lies in its special sauce, which is surprisingly easy to make.
To create this signature sauce, mix 2 tbsp of ketchup, 1 tbsp of mayonnaise, and 1 tbsp of your favorite hot sauce (such as Truff Hot Sauce) in a bowl. You can adjust the heat level to your liking by adding more or less hot sauce.
Customizing the Sauce: Feel free to experiment with different hot sauces to find your perfect blend. This sauce is crucial as it complements the beef and cheese filling in your crunchwrap.
| Ingredient | Quantity |
|---|---|
| Ketchup | 2 tbsp |
| Mayonnaise | 1 tbsp |
| Hot Sauce | 1 tbsp |
You can make this sauce ahead of time and store it in the refrigerator for future use, making it a convenient component of your crunchwrap recipe.
How to Assemble Your Chopped Cheese Crunchwraps
To create a mouth-watering Homemade wrap, you need to master the assembly process. This involves layering the right ingredients in the correct order and folding the tortilla in a way that seals the filling inside.
Layering the Ingredients
Start by warming your burrito tortilla to make it more pliable and easier to fold. A warm tortilla is less likely to tear, ensuring your Crunchwrap stays intact. Layer a cup shredded cheddar cheese on the tortilla, followed by the cheesy ground beef mixture, sautéed onions and peppers, shredded lettuce, homemade spicy sauce, and sliced tomatoes. Top it all off with a bit more shredded cheddar cheese and a crunchy tostada.
The order of layering is crucial for achieving the perfect balance of flavors in every bite. By starting with a base of cheese, you ensure that the filling adheres well to the tortilla, and the cheese top adds an extra layer of flavor.
Folding Technique
Once you’ve layered all the ingredients and placed the tostada on top, it’s time to fold your Crunchwrap. To do this effectively, start by creating pleats around the edges of the tortilla. Work your way around the tortilla, folding it over the filling to create a tight seal. This technique not only encloses the filling but also gives your crunchwrap its signature hexagonal shape.
Proper folding is key to ensuring that your Crunchwrap doesn’t come apart when cooked. By mastering this technique, you’ll be able to enjoy a perfectly assembled Crunchy stuffed tortilla every time.
Cooking Your Crunchwraps to Perfection
Cooking your Crunchwrap is where the magic happens, turning it into a crispy, golden treat. To achieve this, you need to cook it using the right technique, whether on a stovetop or a griddle.
Stovetop Method
To cook your Crunchwrap on the stovetop, place it seam-side down in a skillet over medium heat. This helps seal the edges and prevents the filling from escaping. Cook for about 1-2 minutes or until the bottom is golden brown. Then, flip it over and cook the other side until it’s equally golden brown.
Griddle Method
Cooking on a griddle is similar, but it allows for more even heat distribution. Place your Crunchwrap seam down on the preheated griddle and cook for 1-2 minutes. Flip it over and cook the other sides until crispy. This method ensures a perfectly cooked crunchwrap with a nice seal.
| Cooking Method | Heat Level | Cooking Time |
|---|---|---|
| Stovetop | Medium | 1-2 minutes per side |
| Griddle | Medium | 1-2 minutes per side |
Serving Suggestions
To maximize enjoyment, consider the presentation and accompaniments for your Crunchwraps. Slicing your crunchwrap diagonally can showcase the beautiful layers of ingredients, making for an Instagram-worthy cross-section.
For a complete meal, serve your Crunchwrap with complementary side dishes such as Mexican rice, refried beans, or a simple side salad. You can also enhance the flavor experience with dipping sauce options like additional special sauce, sour cream, guacamole, or your favorite salsa.
Experiment with different recipes and ingredients to find your perfect combination. Whether you’re serving Crunchwraps as a main dish or as part of a larger meal, the right accompaniments can elevate the dining experience.
Recipe Variations and Customizations
The beauty of the fusion dish lies in its adaptability to various dietary needs and tastes. You can experiment with different ingredients to create unique variations that suit your preferences.
Protein Options
You can substitute the ground beef with other protein sources like ground turkey, chicken, or even plant-based meat substitutes for a vegetarian or vegan version. Using different proteins can significantly alter the flavor and texture of your Crunchwraps.
Cheese Alternatives
While shredded cheddar cheese is a popular choice, you can also use other types of cheese like pepper jack for an extra kick or Monterey jack for a milder flavor. Dairy-free cheese alternatives are also a great option for those with dietary restrictions.
Vegetable Add-ins
Adding roasted corn, jalapeños, avocado, or black olives can enhance both the nutrition and flavor of your Crunchwraps. Feel free to get creative with the vegetables you add to make the recipe your own.
Sauce Variations
You can create different sauce variations by incorporating ingredients like chipotle peppers, ranch dressing, or buffalo sauce. These additions can give your Crunchwraps a unique twist and add extra flavor.
By experimenting with these variations, you can keep the fusion dish recipe fresh and exciting, and tailor it to your taste preferences.
Storage and Reheating Tips
While it’s recommended to devour your crunchwrap fresh, you can still savor it later with proper storage and reheating.
To store your leftover Chopped Cheese Crunchwrap, transfer it into a large, gallon-size bag and refrigerate for up to 2 days. When you’re ready to reheat, use a dry skillet on medium heat for a few minutes on each side to restore the crispy exterior.
Avoid microwaving as it can make the tortilla soggy. Alternatively, you can use a toaster oven or air fryer for reheating. If you want to prep in advance, consider making components ahead of time and assembling just before cooking for the best texture and flavor.
| Reheating Method | Result | Tips |
|---|---|---|
| Dry Skillet | Crispy Exterior | Medium heat, few minutes on each side |
| Toaster Oven | Even Heating | Follow oven instructions |
| Air Fryer | Crispiness Retained | Adjust temperature and time as needed |
When reheating on the stove, keep an eye on the sides to ensure even heating.
Nutritional Information
Understanding the nutritional content of your Chopped Cheese Crunchwrap is crucial for making informed dietary decisions. A typical fusion dish contains approximately 785 calories, with a macronutrient distribution of 35g of protein, 55g of carbohydrates, and 48g of fat.
- High fat content: 48g, including 20g saturated fat
- Moderate protein: 35g
- Carbohydrates: 55g, with 6g of fiber and 10g of sugar
It’s also important to note the beef and sauce contribute to a sodium content of around 1371mg per crunchwrap. You can modify the recipe to reduce calories or fat by using alternatives or adjusting portion sizes, such as using a smaller cup measurement for certain ingredients.
Why You’ll Love These Homemade Chopped Cheese Crunchwraps
Imagine sinking your teeth into a crunchy, cheesy, beefy Crunchwrap, all made in the comfort of your own kitchen. “You don’t need the drive-thru to enjoy a Crunchwrap Supreme!” With our easy recipe, you can create an amazing copycat version at home in just a few simple steps.
Making homemade wrap at home offers several advantages. For one, it’s cost-effective; feeding a family of four with homemade crunchwraps costs significantly less than buying them individually from a restaurant. You also gain control over the quality of ingredients, avoiding preservatives and mystery ingredients found in fast food. The satisfaction of creating something delicious from scratch adds to the enjoyment of the meal itself.
Moreover, homemade Crunchwraps offer flexibility. You can customize them to your taste preferences and dietary needs, something that’s impossible with fast food versions. Whether you’re using a tortilla that’s gluten-free or adding your favorite cheese, the options are endless. Enjoy the perfect blend of beef, crunch, and flavor in every bite of your homemade Crunchwrap.
Conclusion
As you wrap up your Chopped Cheese Crunchwraps, you’ll realize that this recipe is more than just a meal – it’s an experience. You’ve successfully transformed a fast-food favorite into a customizable homemade dish perfect for any occasion, from weeknight dinners to casual entertaining.
With seasoned ground beef, melted cheese, and a satisfying crunch from the tostada shell wrapped in a tortilla, this crunchwrap is a true delight. Feel free to experiment with your own variations and share your results.